Monday, April 1, 2013

You Know I like my Chicken Fried: Fried Chicken and Biscuit Recipe


Zac Brown Band's Chicken Fried song always gets me thinking about Fried Chicken.  I hear about my grandmother's fried chicken all the time.  Don't we all?  It's one of those legendary meals that all southerners talk about.  But at least in my house, is not made very often.  Like once in a blue moon.  I'm not saying I don't know why it's not made very often (dredging a big ol' piece of chicken, with the skin, into a coating of flour and then taking it for a swim in a vat of hot grease...I can feel my arteries closing.)   But, all things in moderation.  Right?

Yesterday seemed like the perfect day to conger up some memories from the old days, whip out the cast iron skillet, and go for it.  My dad and I took a trip to Whole Foods, got the freshest little chicken we could find, and we were on our way.  I guess I should pause and say that what really got our mouths watering in the first place for fried chicken was this little cover right here.
Tell me your mouth isn't watering.  This recipe calls for an overnight marinade, so you have to plan for it.  This one is not the traditional southern buttermilk marinade, but a spice rub.  Oh.  Mygosh.  It really was the best fried chicken ever.  I am convinced.  The spice rub flavored the chicken through and through.   The crust was perfectly brown and crisp.  This is the kind of recipe that becomes legendary, is passed down for generations, and has the grandkids talking about how good Grandma's fried chicken is. Don't you want to be that  Grandma one of these days.  Then trust me, save this recipe.  Speaking of legendary, this biscuit recipe is a keeper too.  I found it in Cook's Country.  It is, hand's down, the best biscuit recipe I have tried.

THE BEST Fried Chicken EVER, and Honey Rosemary drizzle
The original recipe is found here

The World's Best Fried Chicken

by Bon Appetit
Keywords: Chicken
Ingredients
  • 2 tablespoons kosher salt, divided
  • 2 teaspoons plus 1 tablespoon freshly ground black pepper
  • 1 1/2 teaspoons paprika
  • 3/4 teaspoon cayenne pepper
  • 1/2 teaspoon garlic powder
  • 1/2 teaspoon onion powder
  • 1 3–4-lb. chicken (not kosher), cut into 10 pieces, backbone and wing tips removed
  • 1 cup buttermilk
  • 1 large egg
  • 3 cups all-purpose flour
  • 1 tablespoon cornstarch
  • Peanut oil (for frying)
Instructions
Whisk 1 Tbsp. salt, 2 tsp. black pepper, paprika, cayenne, garlic powder, and onion powder in a small bowl. Season chicken with spices. Place chicken in a medium bowl, cover, and chill overnight.
Let chicken stand covered at room temperature for 1 hour. Whisk buttermilk, egg, and 1/2 cup water in a medium bowl. Whisk flour, cornstarch, remaining 1 Tbsp. salt, and remaining 1 Tbsp. pepper in a 9x13x2" baking dish.
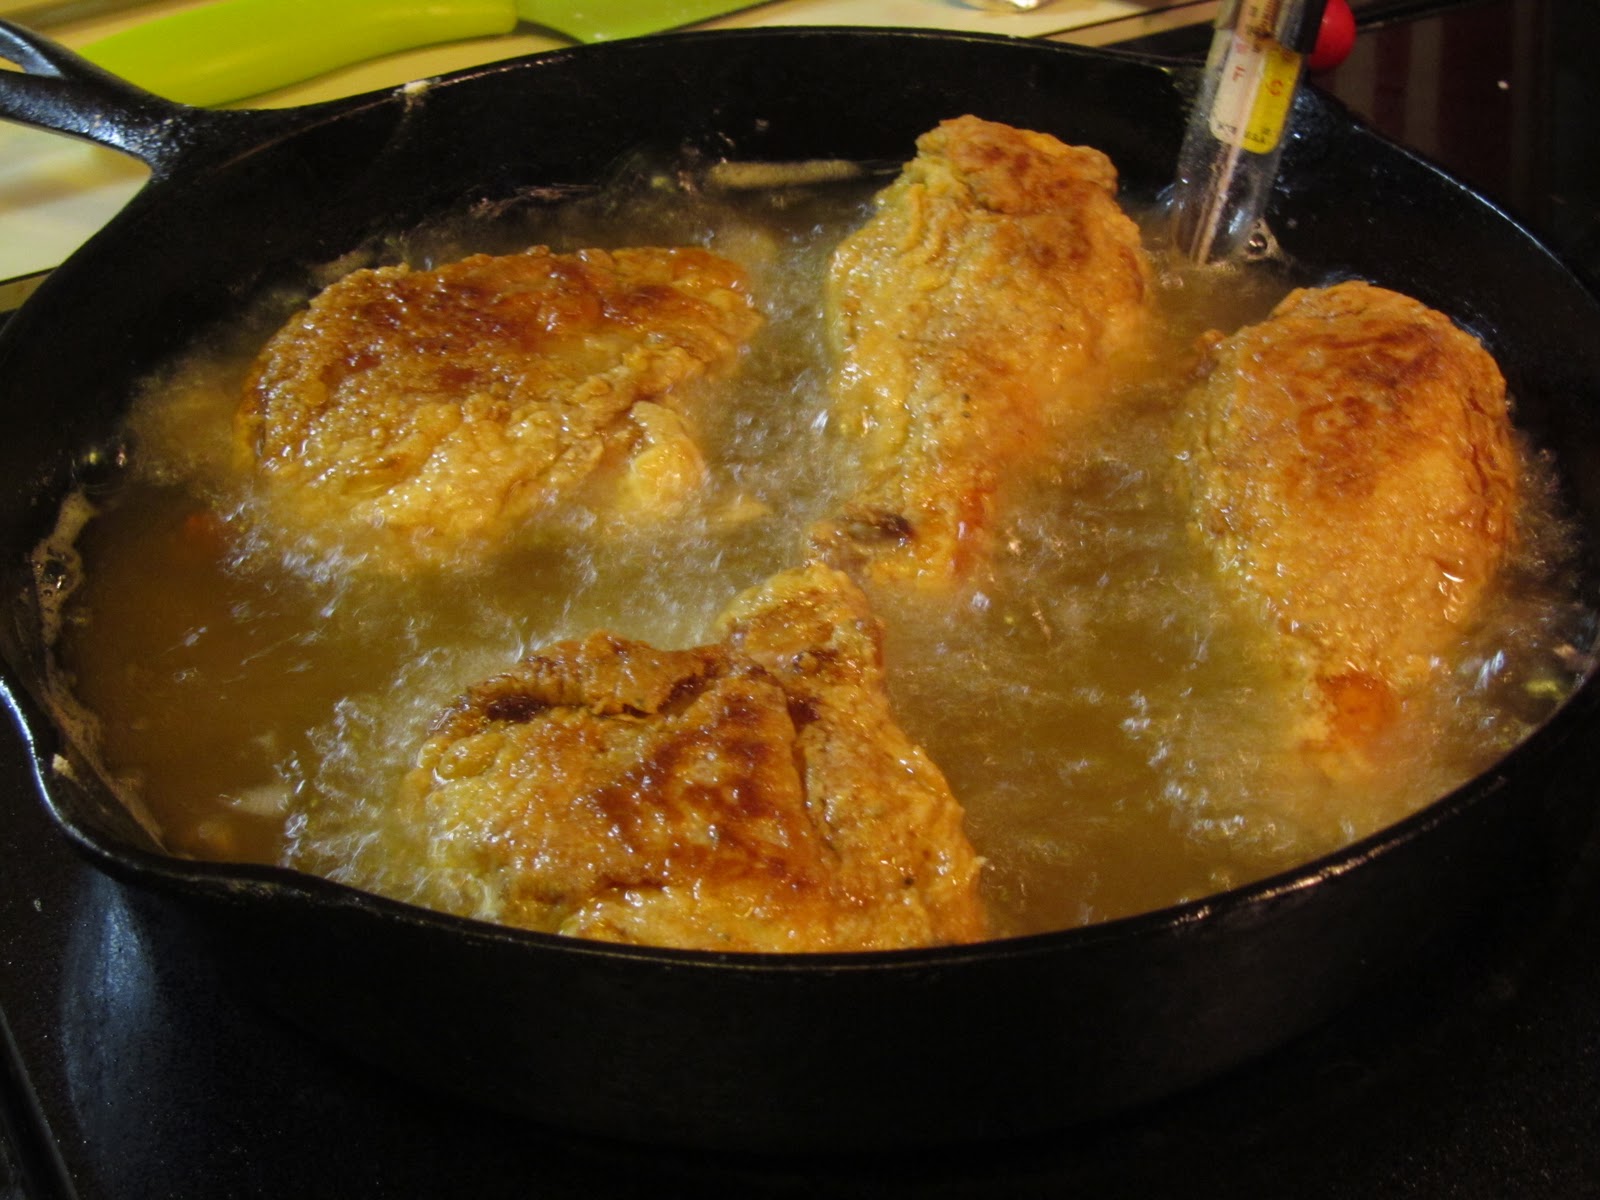
Pour oil into a 10"–12" cast-iron skillet or other heavy straight-sided skillet (not nonstick) to a depth of 3/4". Prop deep-fry thermometer in oil so bulb is submerged. Heat over medium-high heat until thermometer registers 350°. Meanwhile, set a wire rack inside a large rimmed baking sheet.
Working with 1 piece at a time (use 1 hand for wet ingredients and the other for dry ingredients), dip chicken in buttermilk mixture, allowing excess to drip back into bowl. Dredge in flour mixture; tap against bowl to shake off excess. Place 5 pieces of chicken in skillet. Fry chicken, turning with tongs every 1–2 minutes and adjusting heat to maintain a steady temperature of 300°–325°, until skin is deep golden brown and an instant-read thermometer inserted into thickest part of chicken registers 165°, about 10 minutes for wings and 12 minutes for thighs, legs, and breasts.
Using tongs, remove chicken from skillet, allowing excess oil to drip back into skillet; transfer chicken to prepared rack.
Repeat with remaining chicken pieces; let cool for at least 10 minutes before serving.
Powered by Recipage


Honey Rosemary Drizzle

Keywords: sauce
Ingredients
  • 4 rosemary sprigs
  • 1/2 cup honey
  • 1 tablespoon unsalted butter
  • 1 teaspoon hot sauce
  • a pinch of salt and pepper
Instructions
Tie 3 rosemary sprigs together with kitchen twine and use as a brush to slather the honey over everything from biscuits to chicken.
Bring honey, 1 sprig rosemary, hot sauce, and salt and pepper to a simmer in a small saucepan over medium-low heat. Remove from heat and let steep for 30 minutes before serving. Dip the rosemary brush into the honey and use to drizzle over the chicken.
Powered by Recipage


The Best Buttermilk Biscuits EVER
Recipe from "Cook's Country"

Buttermilk Biscuits
by Cook's Country
Keywords: bread
Ingredients
  • 8 tablespoons (1 stick) unsalted butter
  • 4 tablespoons vegetable shortening
  • 3 cups all-purpose flour
  • 1 tablespoon sugar
  • 1 tablespoon baking powder
  • 1 teaspoon salt
  • 1/2 teaspoon baking soda
  • 1 1/4 cups buttermilk
Instructions
1. CHILL FAT Cut butter and shortening into 1/2-inch pieces and refrigerate until chilled, about 30 minutes.
2. MIX DOUGH Adjust oven rack to middle position and heat oven to 450 degrees. Line baking sheet with parchment paper. Pulse flour, sugar, baking powder, salt, and baking soda in food processor until combined. Add chilled butter and shortening and pulse until mixture resembles coarse meal.
3. KNEAD DOUGH Transfer flour mixture to large bowl. Stir in buttermilk until combined. Turn dough onto lightly floured surface and knead briefly, 8 to 10 times, to form a smooth, cohesive ball. Roll dough into 9-inch circle, about 3/4 inch thick.
4. CUT BISCUITS Using 2 1/2-inch biscuit cutter dipped in flour, cut rounds (do not twist cutter, press straight down) and arrange upside down on prepared baking sheet.
5. BAKE BISCUITS Bake until biscuits begin to rise, about 5 minutes, then rotate pan and reduce oven temperature to 400 degrees. Bake until golden brown, 10-12 minutes more. Transfer to wire rack and let cook 5 minutes. Serve warm.
Powered by Recipage


Monday, March 25, 2013

What do you mean he don't eat meat?...that's ok. I make Lamb!


I absolutely love that scene in "My Big Fat Greek Wedding", when the family is blown away that someone has come to dinner and does not eat meat.  But no worries, there is lamb.  I am by no means a vegetarian, however on a weekly basis I really don't eat that much meat.  My sister has been a vegetarian for the last 7 years, and has taught me a lot about eating balanced plant based meals, while being careful to include all necessary nutrients that can be missed in a meatless diet.  In looking back at previous posts, I have not been vegetarian conscious.  In tonight's post, I wanted to celebrate the fun and versatility a big basket of veggies can provide.

For this particular meal I was inspired by my friend, Bridgett.  She posted an array of greek/mediterranean inspired dishes on Facebook.  It took me a mere 10 minutes before I whipped out the grocery list and headed out to recreate the spread.  So fresh and delicious.  Thanks Bridgett!

Hummus or Hommos or Houmous or Hommus...I could keep going, trust me. 
In my search for delicious hummus recipes I began find more spellings for this one seemingly simple dish than there are ingredients in the thing.  Hummus is actually one of the earliest known prepared foods, with a long history in the Middle East.  However the earliest found use of its commonly known spelling hummus, wasn't until 1955 (which was actually translated from the Turkish form of the word humus.  According to Webster's Dictionary, Hummus means chickpeas in Arabic.  If this wasn't enough about the creamy delight, you can find more than you will ever want to know about it here.

I posted a different recipe for hummus earlier, which is similar to this one.  The biggest difference is that this recipe uses dried chickpeas that are soaked overnight and cooked, as opposed to canned.  The difference in texture is unbelievable.  If you think about it far enough in advance, I would definitely recommend this one.  


Israeli Hummus

Inspired by Food and Wine
INGREDIENTS
1/2 pound dried chickpeas
1 tablespoon baking soda
7 large garlic cloves, unpeeled
1/2 cup extra-virgin olive oil
1/4 teaspoon ground cumin
1/4 cup tahini, at room temperature
 1/4 cup fresh lemon juice
Salt
Paprika and cayenne, for garnish
Pita bread, for serving

DIRECTIONS In a medium bowl, cover the dried chickpeas with 2 inches of water and stir in the baking soda. Refrigerate the chickpeas overnight. Drain the chickpeas and rinse them under cold water.

In a medium saucepan, cover the chickpeas with 2 inches of fresh water. Add the garlic cloves and bring to a boil. Simmer over moderately low heat until the chickpeas are tender, about 40 minutes. Drain, reserving 1/2 cup of the cooking water.

Rinse the chickpeas under cold water. Peel the garlic cloves. In a food processor, puree the chickpeas with the reserved cooking water, the olive oil and garlic cloves. Add the cumin along with the tahini and lemon juice and process until creamy. Season the hummus with salt and transfer to a serving bowl.

Sprinkle the hummus with the red pepper and paprika. Serve with pita bread.


This salad is a great summer recipe.  Light, fresh, and filled with great summer produce.

Greek Salad

Recipe inspired by "Dad's Greek Salad"

INGREDIENTS
6 Tbsp olive oil
1/4 cup fresh lemon juice
1 clove garlic, minced
1 tablespoon red wine vinegar
1 teaspoon oregano
1 teaspoon dill weed
Salt and freshly ground black pepper
3 large plum tomatoes, seeded, coarsely chopped
1 cucumber, peeled, seeded, coarsely chopped
1/4 red onion, peeled, chopped
1 bell pepper, seeded, coarsely chopped
1/2 cup Kalamata olives, coarsely chopped
A heaping half cup crumbled feta cheese

 METHOD
 Whisk the olive oil, lemon juice, garlic, vinegar, oregano and dill weed together until blended. Season to taste with salt and freshly ground black pepper. (Can be prepared 3 hours ahead. Let stand at room temperature. Rewhisk before using.)

 Combine the tomatoes, cucumber, onion, bell pepper, olives in a bowl. Toss with dressing. Sprinkle cheese over and serve.

Fresh, Hot Pita

Lately, I have been experimenting with recipes from the book, Artisan Bread in 5 Minutes a Day.  One of my favorites is the pita.  The cool thing about this book is there are a few master recipes that you can choose from, and from there create a variety of breads.  I chose the classic boule recipe and then turned it into pita.

This recipe will make up to 16 good size pitas.  It can easily be halved.
3 cups luke warm water
1 1/2 tablespoons granulated yeast (2 packets)
1 1/2 tablespoons kosher salt
6  to 6 1/2 cups unsifted, unbleached, all-purpose white flour

1.  For the luke warm water, I use hot tap water.  It should register around 100 degrees F.  Warm water will rise the dough to the right point in 2 hours.

2.  Add yeast and salt to the water in a 5-quart bowl, or preferably in a resealable, lidded (but not airtight) food container.

3.  Mix in the flour-KNEADING IS NOT NECESSARY! Add all the flour at once, measuring it by scooping in a dry measuring cup and leveling the top with the back side of a knife.  Don't pack the flour in the cup or the measurements will be off.  Mix with a wooden spoon, high-capacity food processor fitted with dough blade, or heavy duty stand mixer fitted with the dough hook.  You're finished when everything is uniformly moist, without dry patches.  This will be done in a matter of minutes, and will yield a dough that should be wet and loose enough to conform to the shape of its container.

4.  Allow to rise.  Cover with a lid (not airtight) that fits well to the container you are using.  Do not use screw-topped bottles or jars, which could explode from trapped gasses.  Allow mixture to rise at room temperature, until it rises as much as it can and begins to flatten on top, approximately 2 hours.  The dough is ready to use at any time now!

HOWEVER, the longer the dough rests in the fridge, the better it gets.  I have kept unused dough in the refrigerator for up to a week.  It begins to develop a delightful sourdough flavor.

BAKING DAY

1.  Twenty minutes before baking, preheat the oven to 500 degrees F with a baking stone.  When you are ready to bake the pita, cut off a grapefruit sized piece of dough, about 1 pound. This will make 4 pitas.  If you want to bake only one pita, you can cut off a piece the size of a lime, about 1/4 of a pound.

2.  Dust the surface of the dough with flour and quickly shape it into a ball by stretching the surface of the dough around to the bottom on all four sides, rotating the ball a quarter of a turn as you go.  Place the dough on a floured cutting board.  If using the 1 pound size, cut the dough into four equal pieces. (Or keep it large for an extra large pita!)


3.  Using a rolling pin, roll the pieces out into a round with a uniform thickness of 1/8 inch.  You will need to keep adding flour and rotate to prevent sticking.


4.  Depending on the size of your stone, you may need to bake one or two at a time.  Place the round(s) on the stone and quickly close the oven door.  Bake for about 5-7 minutes, until lightly browned and puffed.  This is the exciting part!  It blows up like a balloon!
5.  When you remove the pita, wrap it in a clean cotton dish towel and set on a cooling rack.  The pitas will deflate slightly as they cool, and soften.  The space between the crusts will still be there, but may need to be nudged apart by a fork.

(see the greek salad recipe picture for a look at the deflated pitas)

As I said before, just pull from the dough throughout the week for freshly baked pita everyday.  So easy!

Dolmades

Lastly, I got really brave and decided to create my own Dolmades, or stuffed grape leaves.  This recipe was AMAZING! I will definitely make it again.  However, I will make it when I have a lot of time on my hands.  It is time consuming.

Dolmades or Dolmas

Recipe adapted from Tyler Florence's recipe found here.

Ingredients
 1/2 cup extra-virgin olive oil
1 large yellow onion, finely chopped
1 small fennel bulb, halved, cored and diced
1 teaspoon grated lemon zest
1/2 cup pine nuts
1 cup long-grain rice
1 1/2 cups chicken or vegetable stock
2 tablespoons finely chopped dill leaves
1/4 cup finely chopped flat-leaf parsley
Kosher salt and freshly ground black pepper
1 (8-ounce) jar grape leaves, rinsed and drained (I couldn't find a jar, but found a vacuum pack at a Mediterranean Grocery)
2 lemons, juiced

 Directions
 To make the filling, coat a large saute pan with 1/4 cup of the oil and place over medium heat. Add the onion, fennel and lemon zest and stir until soft, about 10 minutes. Add the pine nuts and rice, saute for 2 minutes, stirring to coat.

Pour in just 1/2 cup of the chicken or veg. stock and lower the heat. Simmer until the liquid is absorbed and the rice is al dente (not fully cooked, being a little chewy), about 10 minutes. Scrape the parboiled rice mixture into a bowl and add the dill and parsley; season with salt and pepper. Allow to cool.

Now on to the grape leaves. Bring a big pot of water to a simmer. Blanch the grape leaves in the hot water for 5 minutes until pliable. Drain, then trim the stems and any hard veins from the leaves. Pat dry with paper towels.


To assemble the dolmades, lay a grape leaf on a work surface, shiny-side down. (The original recipe didn't say to do this, but I found it was easier to roll if I laid two leaves end to end as below, as opposed to one leave only).  Put 2 tablespoons of the rice filling near the middle of the leaves.


 Fold the end over the filling, then fold both sides toward the middle, and roll up into a cigar – it should be snug but not overly tight because the rice will swell once it is fully cooked. Squeeze lightly in the palm of your hand to secure the roll. 

Repeat with remaining grape leaves and filling. Place the dolmades in a large Dutch oven, or wide deep skillet, seam-side down in a single layer. Pour the remaining cup of broth, remaining olive oil, and the lemon juice over the dolmades, the liquid should reach halfway up the rolls, add some water if necessary. Cover the pan and simmer over low heat for 30 to 40 minutes, until the dolmades are tender when pierced with a fork. Serve warm, at room temperature or cool.

 After a meal like this, no one can say being a vegetarian is boring. Nobody.

Saturday, February 16, 2013

A Blast From the Past

In going through some old photos, I found a few I hadn't thought about in quite some time. Step back in time with me, if you will, about 4 years ago...dooleedoo...dooleedoo...dooleedoo. My friend Devon and I were determined to break our way into the food industry. We talked food trucks. We talked restaurants. We landed on Farmer's Market. We decided to try our hands at selling hot, fresh baked goods. And we didn't discriminate. We provided for 2 and 4-legged friends. Oh yes. We were known as none other than...Scones and Bones.
I have to say we were pretty successful, as long as your definition of success means we had many customers, who came back weekly, and bought all of our wares. However if your definition of success involves $$$$, then sadly, we were not. Oh well. We had a GREAT time. Here is a blast from the past, along with a couple of recipes to boot.

Freshly baked peanut butter dog bones, and beef bones
Peanut Butter Dog Treats
Ingredients:
1 1/2 cups whole wheat flour
1 1/2 cups white flour
1/2 cup peanut butter (all-natural or organic)
1 cup water
2 tablespoons oil
Directions:
Preheat the oven to 350 F. Combine oil, peanut butter and water. Add flour, one cup at a time, forming a dough. Knead dough into firm ball and roll to 1/4 inch thickness.
Cut into 3 to 4 inch pieces. Place on an ungreased cookie sheet. Bake at 350 F for 20 minutes. Makes 2 1/2 dozen cookies.


Dill Cottage Bread and Rosemary Boulle
Dill Cottage Bread

Ingredients:
1/2 C milk
1 1/2 Tbsp sugar
1 tsp salt
2 1/4 tsp butter
1 pkg yeast
1/2 C warm water
2 1/4 C regular AP flour
1 Tbsp minced onion
1/2 tsp dill
melted butter
Salt

DIRECTIONS
Scald milk, remove from heat, and stir in sugar, salt, and butter until dissolved. Cool. Dissolve yeast in warm water and add milk mixture. Stir in flour and add onion and herbs. Stir all together. Let rise 45 min. Stir down and continue to stir about 1/2 min. Turn into 8’’ greased loaf pan. Bake about 40-45 minutes, or until golden and begins to pull away from the sides, at 350 degrees. Brush with melted butter and lightly sprinkle with salt. Cool.

Bacon Cheddar Scones, Whole Wheat Beer Bread, Herb Flat Bread

Bacon Cheddar Scones
(Recipe adapted from The Pastry Queen)
Ingredients:
For the scones:
3 cups all-purpose flour
1 tbsp. baking powder
1 tsp. salt
1-2 tsp. ground black pepper (depending on your preference)
8 tbsp. cold unsalted butter, cut into small cubes
1½ cups grated cheddar cheese
4 green onions, thinly slices
10 slices bacon, cooked and chopped or crumbled into small pieces
1 cup buttermilk (plus up to ½ cup extra, if needed)

For the egg wash:
1 large egg
2 tbsp. water

Directions:
Preheat the oven to 400˚ F.  In the bowl of an electric mixer fitted with the paddle attachment, combine the flour, baking powder, salt and black pepper; mix briefly to combine.  Add the cubes of butter and mix on low speed until the mixture is crumbly and the butter pieces are about the size of small peas.  (Alternatively, this can be done in a regular mixing bowl, using a pastry blender or two knives to cut the butter into the dry ingredients.)  Add in the grated cheese and mix just until incorporated.

Mix in the green onions, bacon, and 1 cup of the buttermilk into the flour-butter mixture.  Stir by hand just until all the ingredients are incorporated.  If the dough is too dry to come together, mix in the remaining buttermilk a tablespoon or two at a time until the dough can be formed into a ball.  Transfer the dough to a lightly floured surface and pat the dough into an 8-inch disk.  Slice the dough into 8 to 10 wedges.

In a small bowl combine the egg and water and whisk together.  Brush each wedge lightly with the egg wash.  Transfer the scones to an ungreased baking sheet.  Bake for 18-20 minutes, or until golden brown and a toothpick inserted in the center comes out clean.

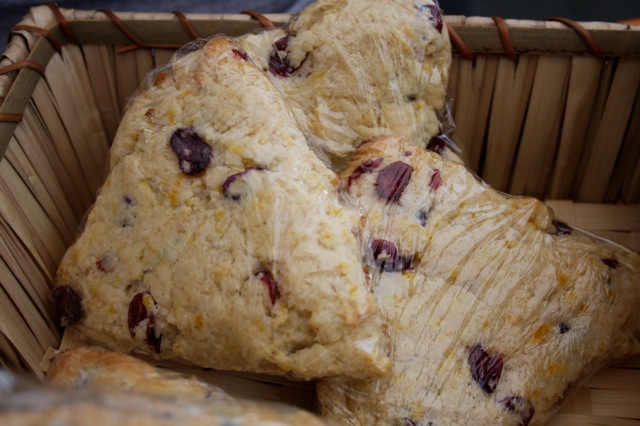
A sampling of our collection

Cheddar Jalapeno Pinwheels

Chocolate Chip Cream Scones

Cranberry Orange Scones

Cream Cheese Orange Pinwheels

Wednesday, October 17, 2012

Fried green Tomatoes

The tomato plant is an amazing organism.  It actually provides a two-for-one deal.  Of course there is the beloved plump, juicy, bright red fruit; the foundation of summer salsas, BLTs, and Caprese Salads, to name a few.  On the other hand, there is the less celebrated firm, tangy, and vividly green sibling.  It is this member of the family that is my summer beacon. Luckily, living in NC, we have warm enough weather even in October to continue my summer thrill clear into fall.  Last weekend I was delighted to come across some beautifully unripe tomatoes at The Downtown Cary Farmers Market.

My grandmother made the B.E.S.T fried green tomatoes, and of course like everything else she made, the recipe was stored in her head.  Hence, I have spent my adult life hitting and missing (mostly missing) until I have come up with a version of my own, that has just enough likeness to Grandmaw's to spark those summertime memories.  I really am not certain of the measurements, so here are my best estimates.

Fried Green Tomatoes

4 bright green tomatoes, about the size of baseballs
1 cup flour
2 cups corn meal
1 1/2 cups buttermilk
2 large eggs
2 teaspoons salt (divided)
2 teaspoons pepper (divided)
2 teaspoons cajun seasoning (divided)
Vegetable oil for frying

Preheat oven to 225 degrees.

In a pie plate, or other wide dish, Combine flour and 1 teaspoon each salt, pepper, and cajun seasoning. Stir well with a fork.   In another pie plate, or dish, combine the buttermilk, eggs, and 1 teaspoon each salt, pepper, and cajun seasoning.  Gently whisk together with a fork.  Lastly, put cornmeal in another pie plate, or dish.

Slice tomatoes into 1/4 inch slices.  Begin by dredging 1 slice into the flour first, shaking off the excess.  Next, dip it into the buttermilk-egg mixture, and finally coating it in the cornmeal.  Carefully lay the coated tomato on a cooling rack while you do the same thing to the other tomatoes.  (I find the coating adheres to the tomatoes better when they have a chance to sit on the rack for a few minutes, as opposed to frying each one immediately after dipping.)

Once all tomato slices have been coated and are waiting patiently on the rack, pour vegetable oil, into a large cast iron or other 10-12 inch skillet, to a depth of about 1/4 inch.  Heat the oil over medium heat.


After about 5-7 minutes (depending on the power of your stove top) test the hotness of the oil by slowly dipping a tomato into it.  It will bubble and sizzle immediately when the oil is ready.  Lay about 4-6 tomato slices, depending on the size of your pan, in the skillet and fry over medium heat for about 5-7 minutes per side, or until a golden brown.  Then flip and do the same on the other side.  Transfer to a baking sheet and hold in a warm oven until all slices have been fried.


Tuesday, May 29, 2012

Como se dice Memorial Day?


This year we celebrated Memorial Day in a non-traditional way.  How?  By having a "Mexican" fiesta.  My sister specifically requested a taco bar this year when she came to visit.  I felt a little weird about the whole thing at first.  But then the more I thought about it, what are our other options...hamburgers?  These all-american patties have been traced to having origins in Germany.  Hot dogs?  Yep, Germany again.  So I thought, what the heck, let's do mexican!

Before we begin, I definitely want to pause and pay tribute to my two very special grandfathers who gave 2 years of their lives fighting for this great country of ours.  I am forever thankful for their bravery and selflessness, as well as for having had them in my life.

Harry L. McKinney Sr.  1923-2006

Served in the United States Navy 1943-1945


John M. Childers Jr. 1923- alive and kickin' :)

Served in the United States Army 1943-1945


On, to the food.  Unfortunately, neither my dad nor I, are able to do anything simply.  Therefore when we get together to cook, we. mean. business.  As in typical family get-together fashion, we divided up the cooking duties.  Normally this is a good plan.  Somehow, this year, we missed the boat on communication. We both started planning dishes, did our own grocery shopping, and somehow forgot to convey to each other our plans.    Our menu ended up including:  Traditional Pork Carnitas, Adobo Shrimp Tacos, Grilled Chicken Tacos, Grilled Tilapia Tacos, and Ground Beef Tacos.  Spanish Rice, Black Beans, Queso, Guacamole, Mild Salsa, Medium Tomatillo Salsa, Hot Chipotle Salsa, Spicy Chipotle Crema, Pickled Carrots, Pickled Onion, Bean Salsa, and Pico de Gallo.  That's not bad if you're feeding 30-40, right?  Well we weren't.  We were feeding 11.

Why do we do this to ourselves?  I honestly don't know.  But it is in our blood.  It is something we HAVE to do.  Thankfully, I have THE. BEST. MOTHER. IN. THE. WORLD.  Cooking is not a passion of hers, but when my dad and I turn into Tasmanian Devils whirling around the kitchen leaving destruction in our paths, she turns into the best sous-chef/dishwasher that has ever graced a kitchen, and happily lets us have our fun.

Let me ask that question again.  Why do we do this to ourselves?  For me, it is a time when my family is back together, in one room, talking, laughing, joking, and of course, the finished product is pretty darn good too.   (On a side note...if you want to see my mom's passion in life, please check out her website here. AMAZING)

Let the marathon begin...


Tacos De Carnitas

Recipe adapted from here
Carnitas are in the first section on the left, grilled chicken on the right

20 corn tortillas
1 kg (2.2 lbs) pork butt or shoulder, cut into small chunks.
2 large, sliced oranges (including the skin)
2 bay leaves
6 cloves of garlic
1 cinnamon stick
2 tbsp ground oregano
1/4 tbsp grounded clove
50g (1/4 cup) pork lard (optional, but traditional) (we made this without the lard...)
salt to taste
pico de gallo
salsa verde
chopped onion
cilantro
lime

Directions:
Start by cutting the excess fat off the pork meat. Cut the pork pieces into pieces that are a few inches wide. Then place all the meat in a big pot.

Add enough water to cover it by about 2 inches, then add the orange, garlic, pepper, cinnamon, bay leaves, the oregano, salt and the clove. Bring to a boil, reduce the heat and continue cooking for 60 min or until meat is very tender, and be sure to add more water if necessary so the meat stays covered the entire time.

 When tender enough, add salt, and keep cooking it for another 10 minutes or until all the water has evaporated. Drain the meat and place on a separate plate.

 **You can opt to serve it from this point, but and the meat will be a little softer, or maybe try it with vegetable oil**

 Heat the lard in the same pot. When hot, add the meat until it’s fried golden, about 10 to 20 minutes. Mix it often so the meat doesn’t stick and add a little water now and then to keep it from sticking to the pot. Once it has fried, remove the bay leaves and cinnamon, then drain the meat in paper towels.

 Heat up the corn tortillas: 1 min each/side. Place two on each plate and add a portion of the meat in the center of the tortilla and fold in half. Do that with each taco.

Garnish each with cilantro and onion, your salsas, and a wedge of lime, and serve!
Carnitas can be kept in the refrigerator for up to 5 days and then just need to be reheated before assembling the tacos you serve later on.

(pickled carrots are in the front tray, pico de gallo on the left, pickled onions in the middle, chopped onion in the back, and chopped cilantro on the right)

Spicy Pickled Carrots

Find the original recipe here

Ingredients:
2 lbs large carrots, peeled and sliced into 1/4 inch thick pieces
5 cloves garlic peeled and diced
1 1/2 cups vinegar
1 1/2 cups water
10 bay leaves, whole
8 peppercorns
1 teaspoon salt
6 oz. pickled jalapenos

Preparation:
Heat oil in a large saucepan and saute the garlic. Add in carrots and saute for 2-3 minutes. Carefully add in vinegar, peppercorns, salt, and and bay leaves. Bring to a simmer for 5 minutes and then add water and jalapenos and bring to a simmer again for another 10 minutes.

Let it cool completely and then transfer the carrots and cooking liquid into a covered container and refrigerate overnight. Store the carrots in the liquid and use a slotted spoon to serve them. You may leave the bay leaves in the liquid to add to the flavor, but do not eat them. Always remove the bay leaves before you eat the carrots.

Shrimp in Adobo

(The section in the middle contains the adobo shrimp (left) and tilapia (right))
Recipe adapted from Bon Appetit

Ingredients
6 dried ancho chiles, stemmed
4 garlic cloves
1/4 cup apple cider vinegar
2 teaspoons kosher salt plus more for seasoning
1/2 teaspoon dried oregano, preferably Mexican
1/2 teaspoon ground cumin
1/2 teaspoon sugar
2 pounds small or medium uncooked shrimp, preferably wild American peeled, deveined, cut into 1/4-inch pieces

Ingredient Info: Dried ancho chiles are available at specialty foods stores, Latin markets, and some supermarkets.

Preparation:

Heat a large dry cast-iron skillet over medium-high heat. Add chiles; toast, turning often, until just fragrant, about 1 minute. Let cool.

Using kitchen scissors and working over a medium bowl, cut chiles into 1-inch rings, reserving seeds. Cover chiles with 1/2 cup hot water; let soak, stirring occasionally, for 10 minutes.

Transfer chiles with seeds and soaking liquid to a blender. Add garlic, vinegar, 2 tsp. salt, oregano, cumin, and sugar and purée until a smooth, thick paste forms. Transfer adobo paste to a large bowl; add shrimp and toss until evenly coated.

Preheat broiler. Place shrimp on a rimmed baking sheet in an even layer. Broil, watching closely and stirring halfway through, until shrimp are just cooked through and are browned in spots, 4–5 minutes. Season with salt.

Serve with shredded cabbage and salsas of your choice, on corn or flour tortillas.

Tomatillo Salsa (left),  Tomato Salsa (middle), Chipotle Lime Crema (right)

Tomatillo Salsa (salsa verde)

Find the original here

4-5  husked, rinsed, and halved tomatillos (about the size of a tangerine)
2 large cloves of garlic, peeled
1 jalapeño or 2 serrano chiles, stemmed and roughly chopped
1/3 cup (loosely packed) roughly chopped cilantro
1/2 small white onion, finely chopped
1/4 cup water
Sugar
Salt
Procedures
Preheat a grill over medium heat. Grease grates with vegetable oil. Place tomatillo halves on the grill, cut side down. Grill until browned and they begin to soften. Flip and continue to cook until completely softened. Remove the tomatillos to the work bowl of a blender or food processor. Let cool to room temperature.

Add garlic, chiles, cilantro, and 1/4 cup of water to the bowl and pulse until coarsely pureed. Pour salsa into a small dish and stir in the onion. Thin the salsa out with more water if necessary. Taste and add sugar if the salsa is too tart. Season with salt to taste.

Grilled Tilapia Tacos 

Recipe adapted from here

Ingredients:
Marinade
1/4 cup extra virgin olive oil
2 tablespoons distilled white vinegar
2 tablespoons fresh lime juice
2 teaspoons lime zest
1 1/2 teaspoons honey
2 cloves garlic, minced
1/2 teaspoon cumin
1/2 teaspoon chili powder
1 teaspoon seafood seasoning, such as Old Bay™
1/2 teaspoon ground black pepper
1 teaspoon hot pepper sauce, or to taste
1 pound tilapia fillets, cut into chunks


Chipotle Lime Crema
1 (8 ounce) container light sour cream
1/2 cup adobo sauce from chipotle peppers in adobo (if you don't like HOT, I would use 1/4 cup)
2 tablespoons fresh lime juice
2 teaspoons lime zest
1/4 teaspoon cumin
1/4 teaspoon chili powder
1/2 teaspoon seafood seasoning, such as Old Bay™
salt and pepper to taste


Toppings
1 (10 ounce) package tortillas (corn or flour)
3 ripe tomatoes, seeded and diced
1 bunch cilantro, chopped
1 small head cabbage, cored and shredded
2 limes, cut in wedges

Procedure:
To make the marinade, whisk together the olive oil, vinegar, lime juice, lime zest, honey, garlic, cumin, chili powder, seafood seasoning, black pepper, and hot sauce in a bowl until blended. Place the tilapia in a shallow dish, and pour the marinade over the fish. Cover, and refrigerate 6 to 8 hours.

Preheat an outdoor grill for high heat and lightly oil grate. Set grate 4 inches from the heat.

Remove fish from marinade, drain off any excess and discard marinade. Grill fish pieces until easily flaked with a fork, turning once, about 9 minutes.

Assemble tacos by placing fish pieces in the center of tortillas with desired toppings.


Creamy Guacamole


4 large ripe avocados
2 tablespoons finely chopped sweet onion
3 tablespoons freshly squeezed lime juice
1 tablespoon chopped cilantro
1/2 fresh jalapeno, seeds removed, and finely chopped (optional)
salt and pepper to taste

Preparation:
Cut avocados in half, lengthwise, remove seed and spoon out meat from shells.
Combine avocado and remaining ingredients in a large bowl and mash together using a fork.


Monday, January 9, 2012

Jar of Hearts: Sugar Cookie Recipe


I am so excited about my next big cooking venture. I will be co-teaching some cooking classes for kids at a great little restaurant called Relish.  They contacted me in November to ask if it was something I would be interested in, and I replied "ARE YOU KIDDING ME?!" "Sure, I would love to".
Our first round of classes will begin in February.  One is called "Jar of Hearts", in which kids will be

Wednesday, December 21, 2011

Oh Baby It's Christmas, all over again: Gingerdoodles and other holiday recipes


It never fails.  The week before Christmas, on that drive home from school (the moment when Christmas break has begun) I turn the radio up, sing whatever Christmas song happens to be on the radio and feel purely giddy cause it's Christmas, all over again.    I am really excited this year, because most of the family will be back together for the first time in while.  Because I am REALLY feeling the Christmas Spirit this year, I will even forgive Don Schwenneker, my abc11 weatherman, for telling me it is going to be close to 70 degrees on Christmas.  uggghh.
My Christmas baking topped an all time high this year.  My grandmother asked me to do up some goodies for her to give as gifts.  I decided to go all out and do plenty for her to give, as well as me.  O.M.G.  I was sure my best friend, the yellow Kitchen-Aid, would shut down and never speak to me again.  To my surprise, that good buddy pulled through and is still going strong.  On the menu?

Sunday, November 20, 2011

Tomato Dumplings

                                    
 A couple of years ago when I started my part time catering, I wanted to come up with a name that really represented me.  After throwing names around for days, I finally came up the the perfect one.  Tomato Dumplings.  They are a perfect balance of fresh earthiness from the tomatoes, and warm hominess of the dumplings.
           My Grandmother Mckinney, was the sweetest, most loving grandmother anyone could ask for.  She was always laughing, and welcomed everyone with open arms.  And she was also, always cooking.  What a cook she was!  Grandmaw never used a recipe; everything she knew how to cook, she had

Friday, November 18, 2011

Another trip to the Farmers' Market


One of my favorite ways to spend a Saturday morning is perusing the daily offerings at my local farmers' market.  Farmers' markets were just beginning to grow in popularity as I was moving from Virginia to North Carolina, about 5 years ago. Growing up, I always took for granted the fresh potatoes, tomatoes, cucumbers, and squash I would enjoy from my dad's garden and grandfather's farm.  It wasn't really anything special, until  I realized it actually was.  I noticed more and more markets popping up in town, and surrounding towns offering fresh produce, grown by local farmers.  Fruits and Veggies, directly from the the soil, some with dirt still attached was now in high demand.
Living in Cary, there are at least 6 farmers' markets within 30 minutes from my home.  One of those being the state farmers' market.
This past weekend, I visited one of my favorite locations, The Western Wake Market.  If you get a chance to go, stop by and visit the folks from Coon Rock Farm.  I LOVE them!  They offer heirloom variety vegetables, raised without any chemicals; as well as pasture raised, antibiotic and hormone free chickens, eggs, pigs, lamb, and goat.
I came home with a fresh stalk of ginger root, and 2 bunches of Hakurei turnips, and a chicken (which comes in a little later).  The turnips are small, sweet, and delicious.  They can be eaten raw or cooked.  All of this really put me in the mood for fall so I decided to make sauteed turnips and greens, carrot ginger soup, and pumpkin-cranberry bread.
I got the soup recipe from this blog.  I used homemade chicken stock instead of vegetable broth, and

Monday, November 7, 2011

It's a ...Family Tradition


Do you know that old Hank Williams Jr. song, Family Tradition?  Well, I've got a family tradition too.  It's not quite as exciting as Hank's, but it's a heck of a lot tastier.   What is mine you ask?  Pizza.  mmmm.  Hot, crusty, cheesy, chewy pizza.  Our tradition has been a kind of evolution, of sorts.   For as long as I can remember Friday night has been dedicated to pizza at home.  Way back when, lets say 15 years 20 years, well it's been a long time, my family and I would head across the street, literally across the street, for the shopping.  The first stop...Chef Boyardee, all in one "make it yourself" pizza kit.

We also picked up some green peppers, onion, and green olives.  Oh we were living large.  We would come home, my parents would crank up NPR and the stove.  In that order.  TO THIS DAY, I can't hear the theme song of NPR's All Things Considered, without craving that Chef Boyardee goodness.


As time passed, we got an itch to be a little more adventurous. We evolved from the box o'pizza, to a much more classy bag of instant pizza crust.  Something like Martha White.

Somehow, between not being right out of a box, and actually having to buy sauce separately we felt like we were moving up in the world.  Well it wasn't too long after that when we really put our big girl panties on and attempted the ultimate feat...made from scratch, homemade, pizza dough.  Oh my gosh.  We were the talk of the town. You think I'm kidding?  No.  The town paper actually wrote an article about us.  There wasn't much news in this town mind you, but true story none-the-less.  It wasn't long before we were experimenting with pizza peels, quarry tiles in the oven, homemade pizza sauces, there was even talk about making our own mozzarella.  We haven't gotten there yet.  Yes, we were pizza making monsters.  We were searching for challenges, begging for obstacles.  We had a hunger that couldn't be satisfied.

Monday, September 26, 2011

Returning to My Roots...for the first time


Birthdays are funny things.  For me, no other day is filled with as wide a spectrum of feelings as September 24th.  Obviously there is excitement.  I think I will always feel that childlike bubbling over of "It's my birthday!  Did you know tomorrow is my birthday?!"  But then, reality sinks in and that big black rainy cloud moves over and bursts those "yay, its my birthday" bubbles and replaces them with "oh, yeah.  it's my birthday".  wow.  another year has gone by, and am I really that much closer to my life long goals...whatever they may be?  But alas, as fast as those dark clouds moved in, they are swept away and replaced with warm calming rays of sunlight.  Another year is ahead of me.  Another year that is untouched, and ripe with possibilities.

This year, I went back to my roots by spending my birthday weekend with my parents.  We loaded up the car and headed to Charleston SC.  It was my first time visiting the historic city but I am confident it won't be my last.  From the moment I heard about Husk Restaurant, I knew I had to go.  My parents recommended we make a weekend of it and go for my birthday.  Sold!

Never heard of Husk, you say?  Please.  Do yourself a favor and keep reading.  Two words:  Sean Brock.  The Executive Chef, and mastermind behind the keystone restaurant.  My ears perked up a few years ago when I heard Chef Sean Brock's name casually thrown out on the Food Network.  Sean?  The same Sean who used to live across the street from me during high school?  With cooking being one of my greatest passions, I immediately tuned in and became a Sean Brock groupie.  It was quite an inspiration to realize that someone I had known, had become such a successful chef.

Before long, Sean's name was everywhere.  I couldn't believe my ears when I heard he was a James Beard nominee.   But the surprises kept on coming as I read a few weeks later, he won!  What really won me over, however, was when I read about the creation of his newest restaurant, Husk.  It was as if all of my philosophies about food were wrapped up, and put into a neat little package called Husk.  Here, Sean offers a new menu daily, celebrating traditional southern cuisine.  If that weren't enticing enough, he only uses ingredients he can find below the Mason-Dixon Line.  Something else that sets him apart from the crowd, is that on his website and even on each menu, he celebrates the hard working folks who have brought the food from the farm to the kitchen and ultimately to the table.  Sean lists the farmers, fishermen, millers, etc. by name, who provide their goods, as well as links to their websites.  This is a service that is almost unheard of in the restaurant business.

If you can't tell, I'm smitten.  There wasn't a doubt in my mind, I HAD to go.